


 16.26
16.26
 Unknown
SQUID PROXY SERVER adalah salah satu Proxy yang
berfungsi untuk melakukan caching atau penyimpanan sementara akses
internet oleh suatu client / user sehingga konten ini dapat dipergunakan
oleh user lain sehingga dengan adanya caching ini user lain tersebut
akan merasakan akses internet menjadi lebih cepat. ( Ya iya lah, lha
wong sebagaian konten dari Webpage tersebut sudah ada dalam storage
penyimpanan Proxy Server ini ).
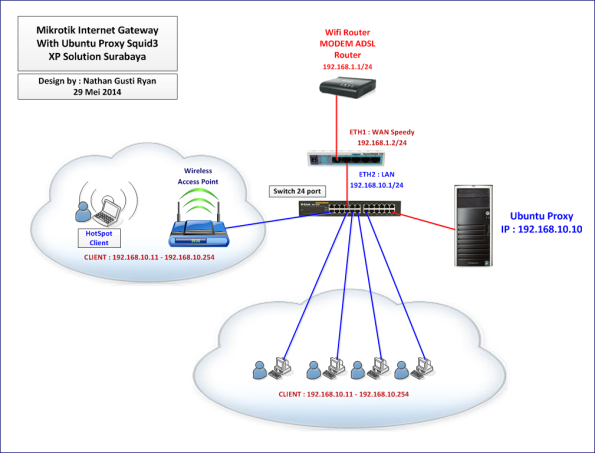
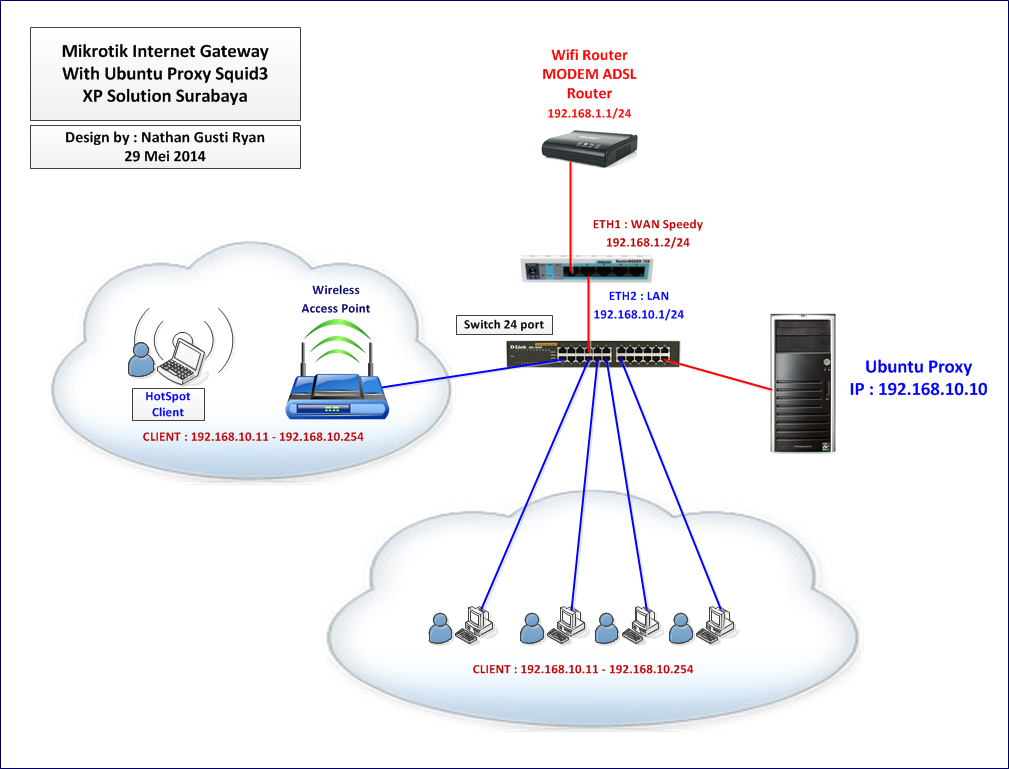
Pada tutorial kali ini konsep desain atau topologi-nya adalah sebagai berikut :
Step By Step Installasi Proxy Server Squid3 dengan Ubuntu 14.04 dan Webmin ( Simple Mode ) adalah sebagai berikut :
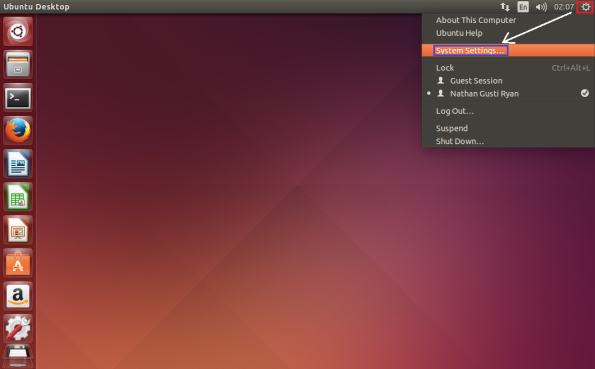
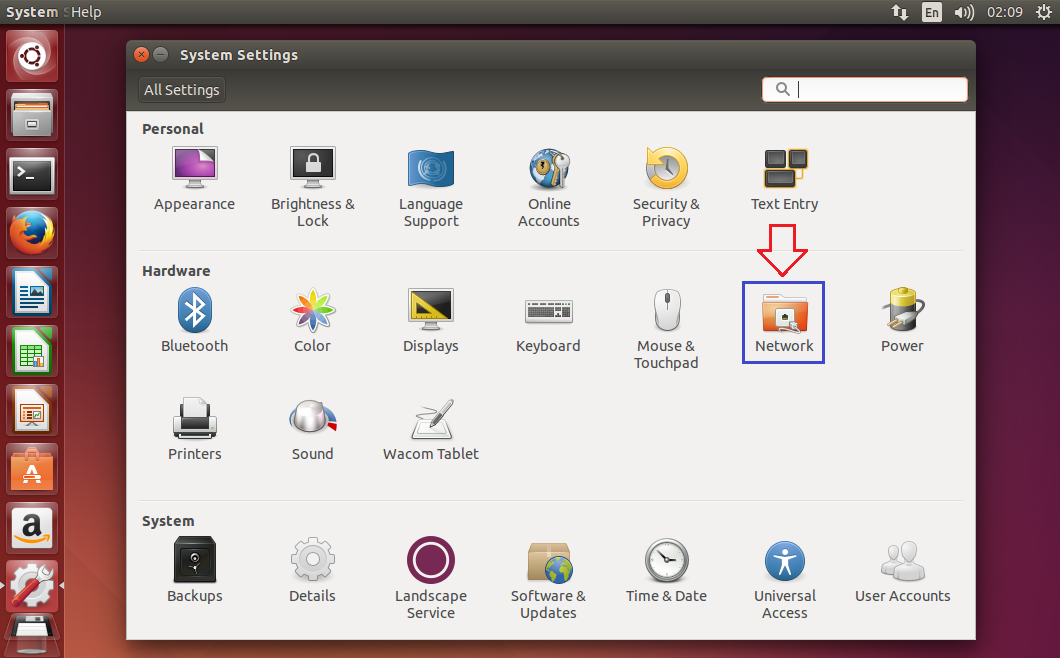
1. Masuk ke menu System Setting.
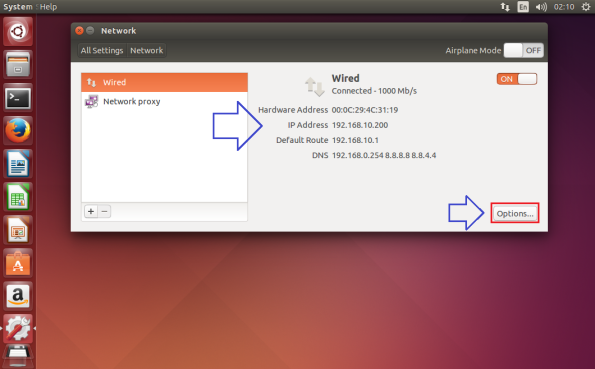
2. Masuk ke Menu Network.

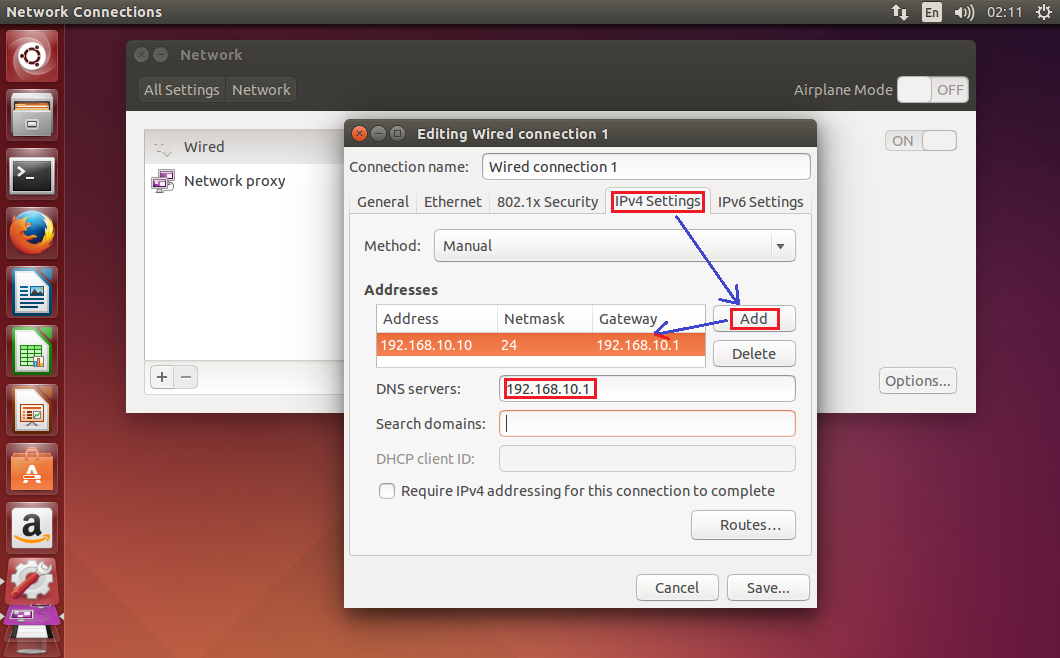
3. Lalu masuk ke menu Option, untuk melakukan konfigurasi IP Address secara manual.
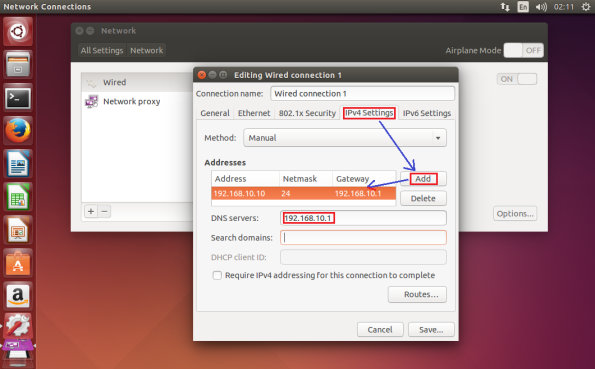
4. Selanjutnya masuk ke menu IPv4 Setting, ubah method dari Automatic /( DHCP ) menjadi manual.
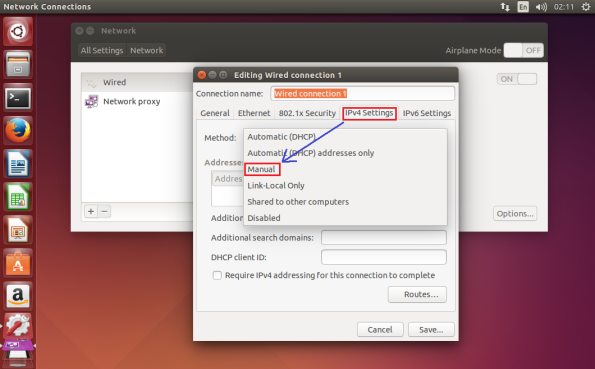
5. Klik Add untuk menambahkan IP Address manual. Lalu entry IP untuk PC Ubuntu : 192.168.10.10, Netmask : 24, IP Gateway : 192.168.10.1, IP DNS : 192.168.10.1. Lalu kita klik Save.
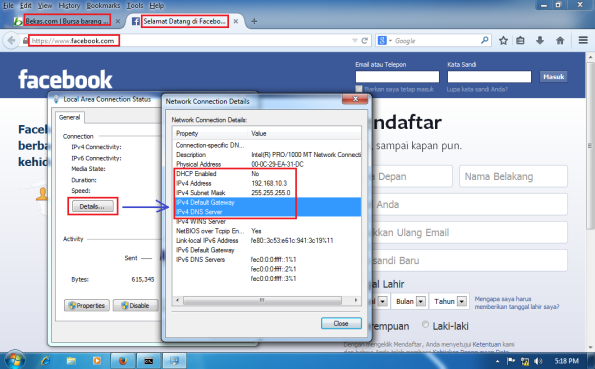
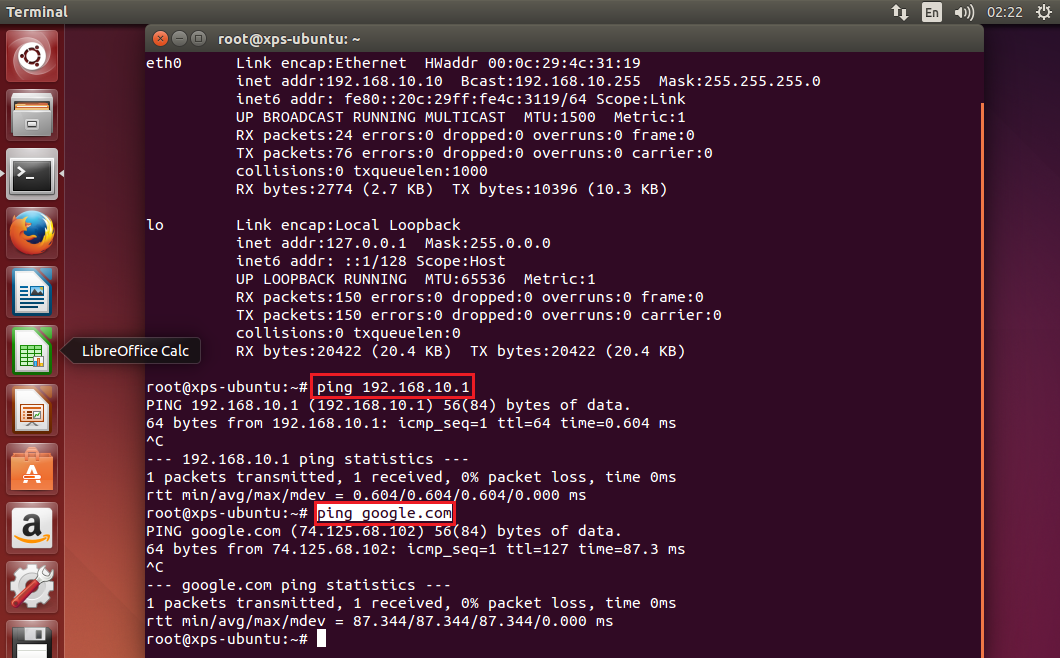
6. Selanjutnya masuk ke Terminal untuk melihat apakah IP address Ubuntu Proxy Server sudah sesuai yang di konfigurasi tadi.
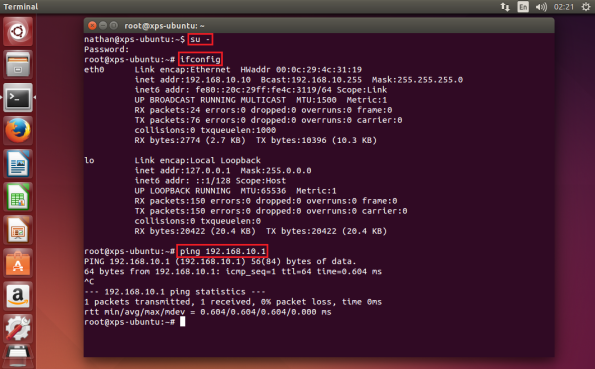
7. Pastikan bisa ping ke IP Gateway ( 192.168.10.1 ), maupun ke Google.com.

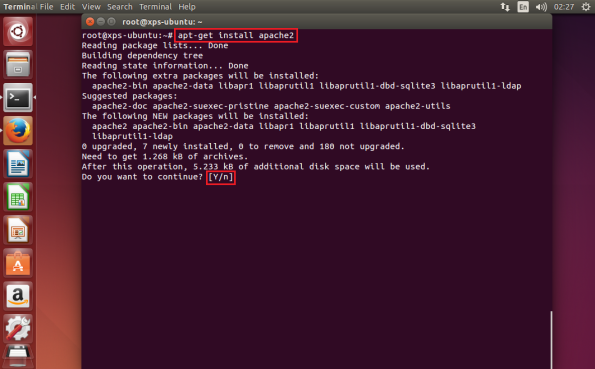
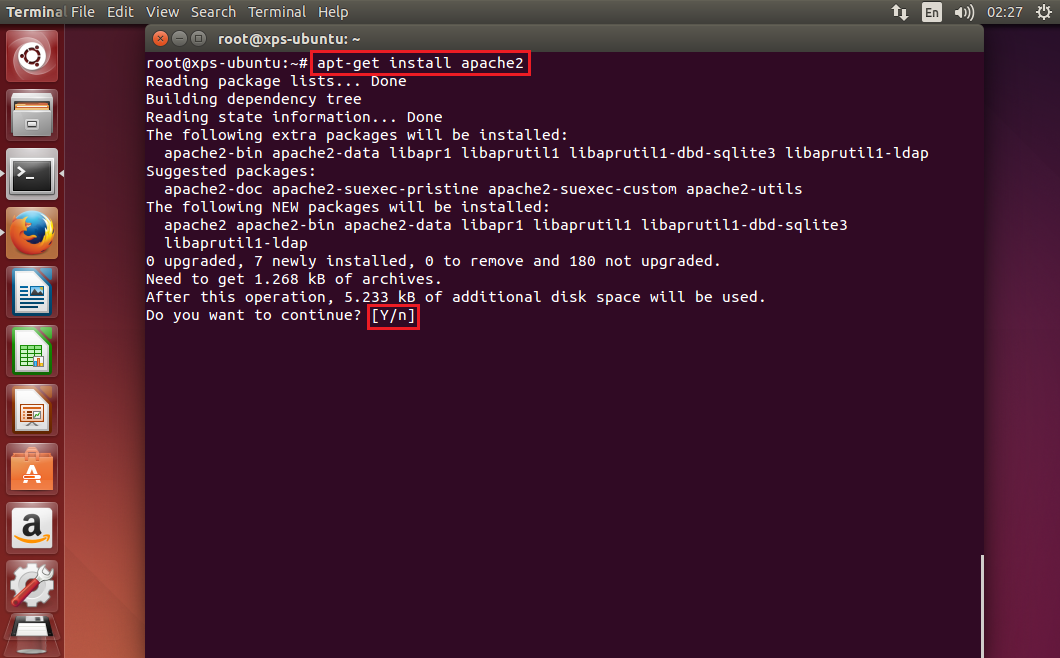
8. Selanjutnya kita Install paket Apache2 Webserver ( nanti akan banyak kita gunakan ) :
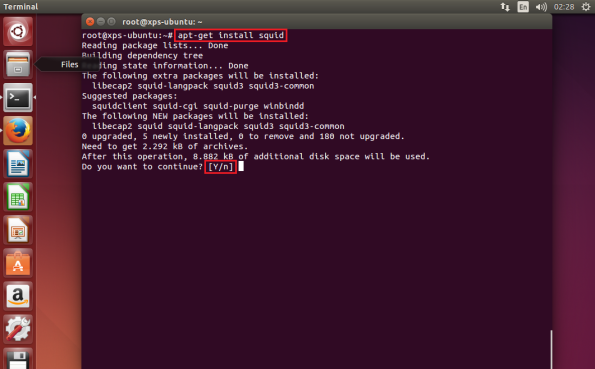
9. Selanjutnya kita Install paket Squid3 :
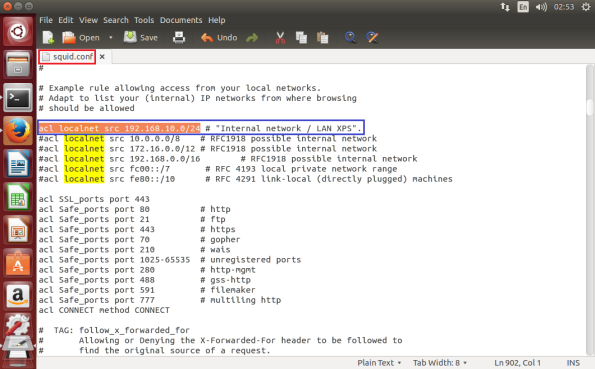
10. Selanjutnya kita lakukan editing file konfigurasi Squid ( bisa dengan perintah nano maupun gedit ). Pastikan kita setting ACL Internal IP Address Network kita.

11. Jika kita gunakan gedit, setting Access Control List / ACL Internal IP Address Network kita tampak seperti pada gambar dibawah ini :
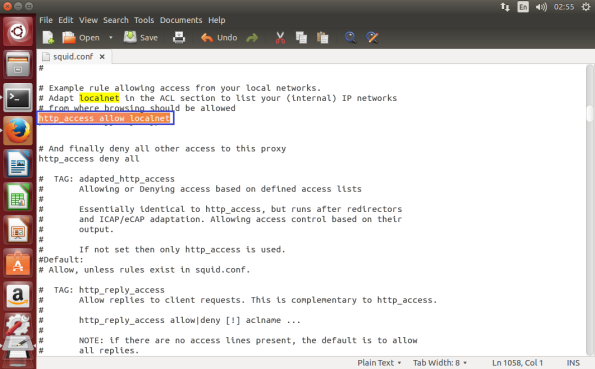
12. Selanjutnya pastikan ACL Local network kita disetting Allow.
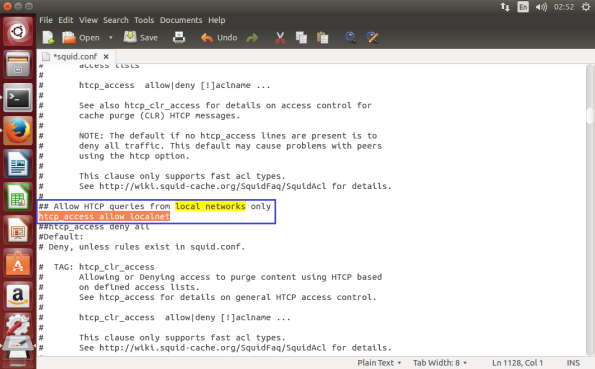
13. Cek juga setting ACL Local network di baris yang lain.
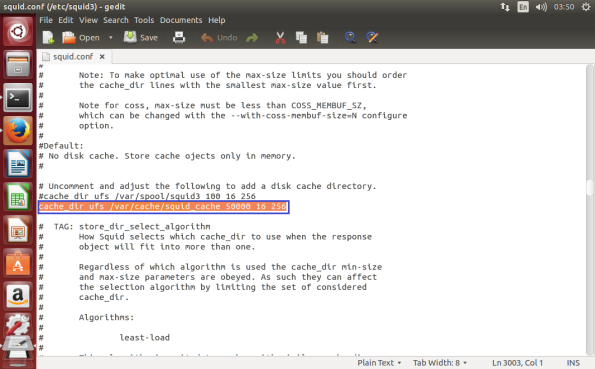
14. Tentukan folder cache_dir dengan tepat serta ukuran besar kapasitas untuk menyimpan file cache. Nilai Defaultnya adalah 100 alias 100 MB, kita ganti menjadi 50 GB ( 50000 ).
15. Tentukan Port access Proxy Server, defaultnya Squid mengunakan Port 3128.

16. Setting Port 3128 dengan gedit.
17. Setelah konfigurasi cukup, selanjutnya berikan perintah :
Selanjutnya berikan perintah untuk menjalankan Squid3 :
18. Untuk membuat Service Squid3 ini bisa Otomatis dijalankan saat komputer baru hidup, maka kita dapat mengunakan perintah chkconfig atau mengunakan Sysv-rc-conf.

19. Perintahnya adalah :
20. Melakukan pengecekan status aplikasi yang telah dilakukan Autorun. Perintahnya :
21. Setelah installasi dan konfigurasi Squid selesai, selanjutnya kita akan melakukan installasi Webmin dengan tujuan untuk mempermudah konfigurasi Squid3. Baca link ini dengan seksama : www.webmin.com/deb.html
22. Lakukan installasi perintah pre-installasi :

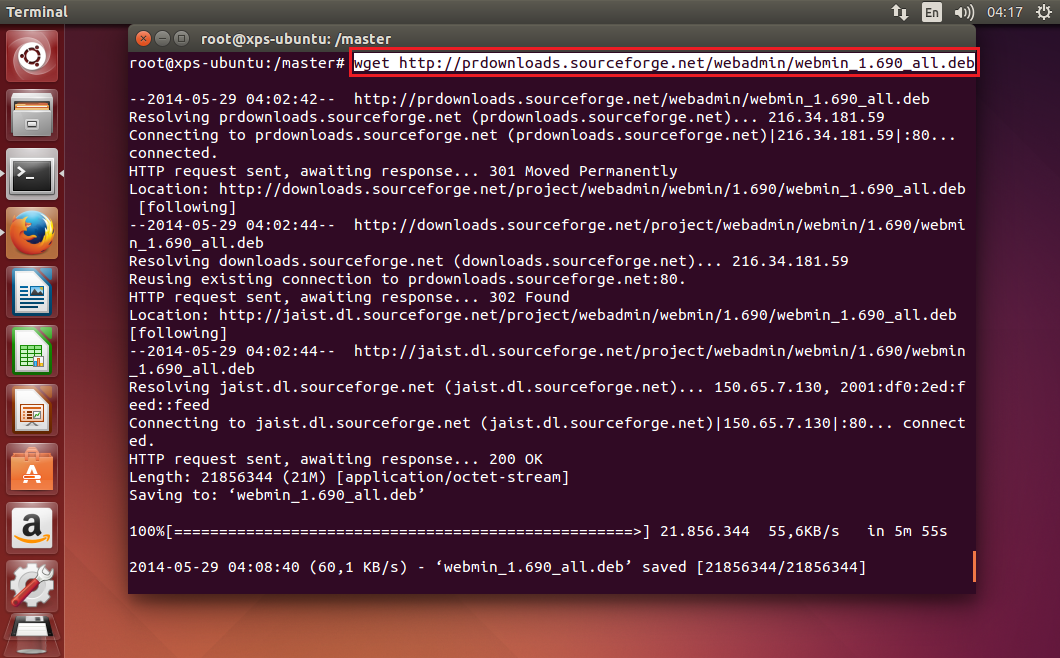
23. Lakukan perintah untuk men-download installer Webmin :

24. Lakukan installasi paket Webmin yang telah di download barusan :
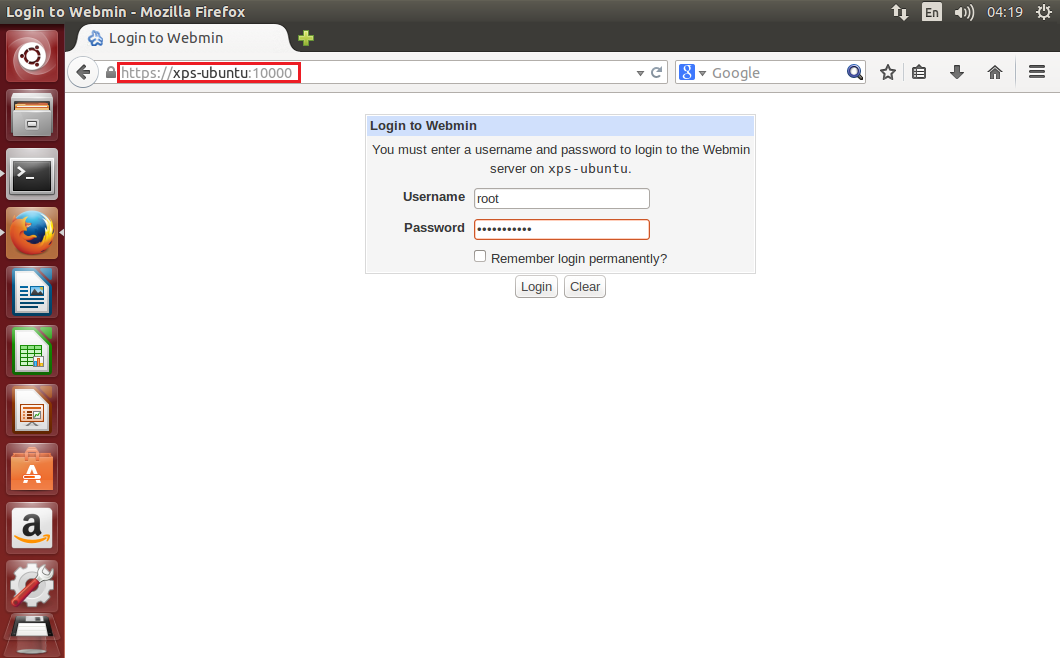
25. Setelah proses installasi Webmin selesai, selanjutnya kita dapat mengakses Webmin via WebBrowser :
https://192.168.10.10:10000

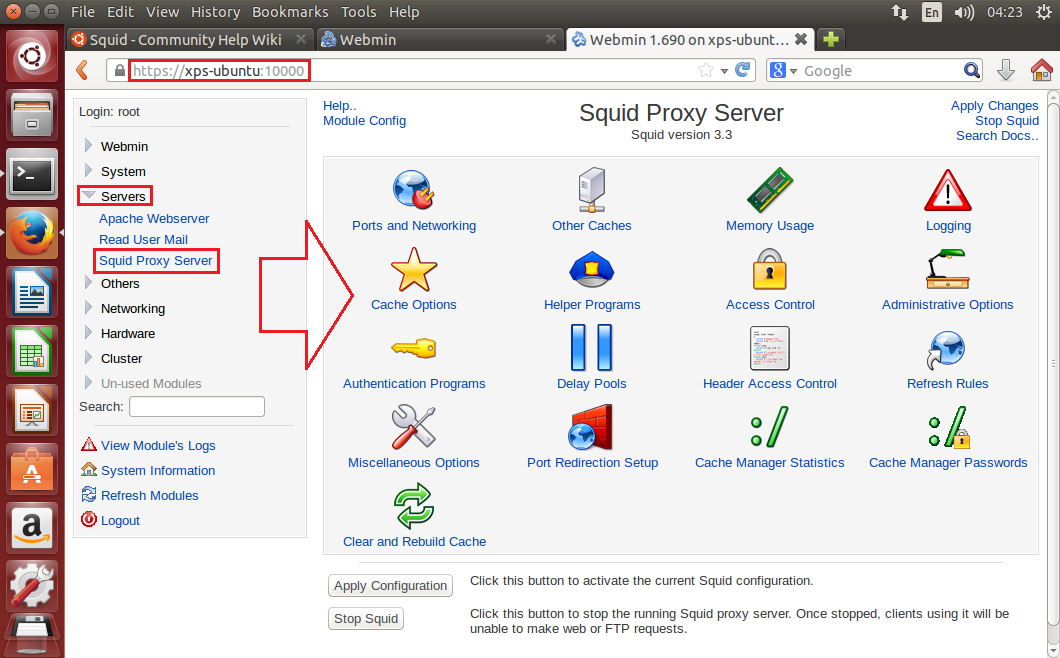
26. Selanjutnya masuk ke menu Server lalu pilih Squid Proxy Server. Selanjutnya kita mau konfigurasi lebih lanjut via Webmin.
27. Administrative menu.
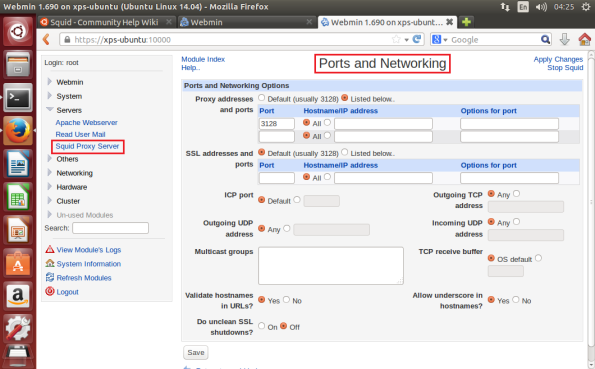
28. Port & Networking menu.
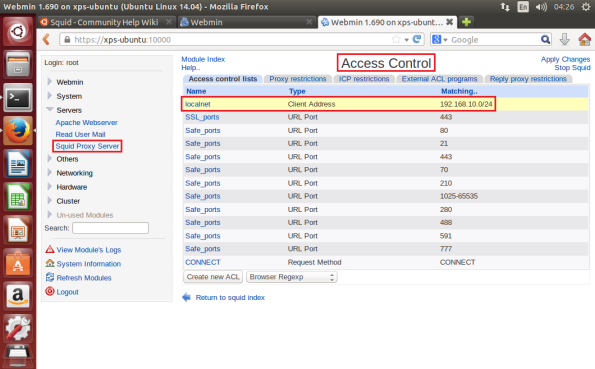
29. Pilih menu Access Control untuk melakukan konfigurasi client mana saja yang boleh mengakses internet.
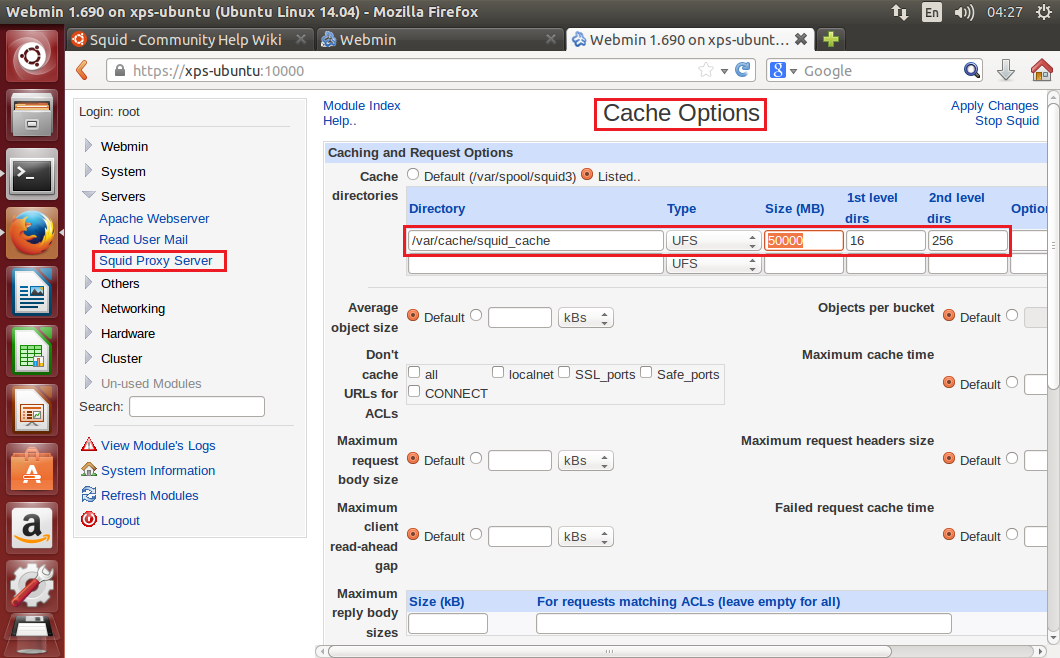
30. Pilih menu Cache Option, untuk menentukan folder untuk cache, dll.

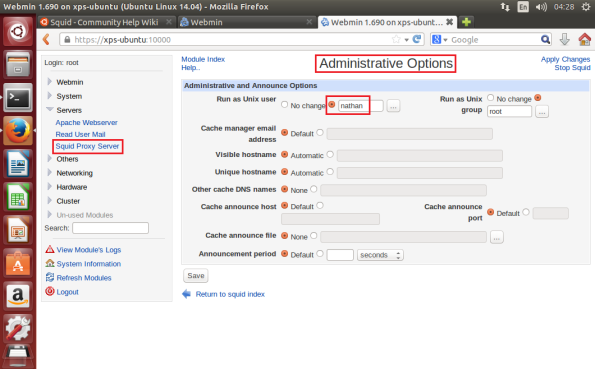
31. Administrative Option merupakan penentuan user Administrator dengan akses dapat melakukan read write pada folder konfigruasi Squid.
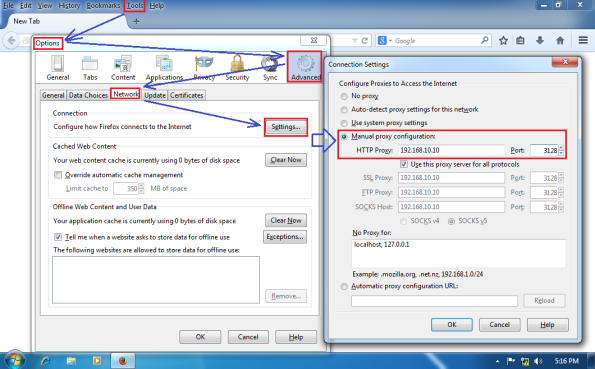
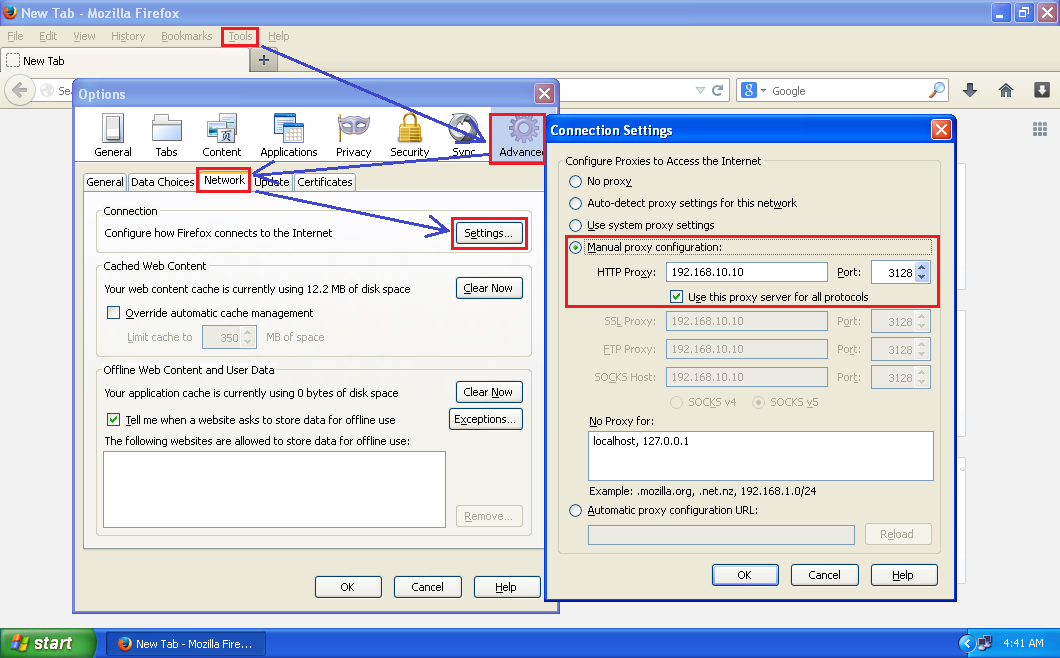
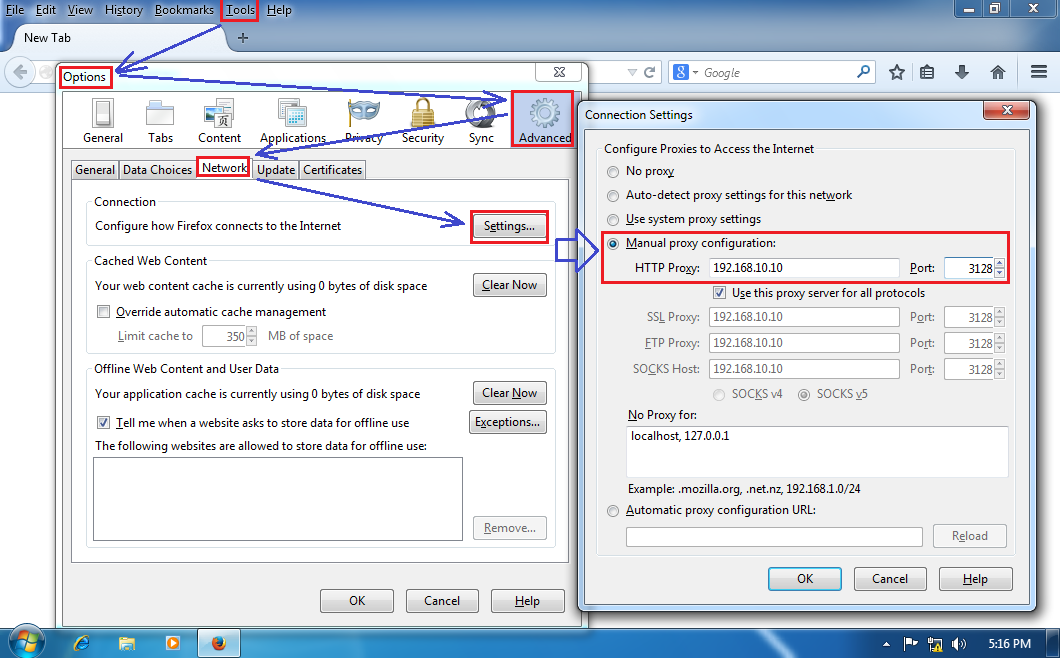
32. Okey, sampai disini konfigurasi Squid Linux Ubuntu 14.04 telah selesai. Selanjutnya kita akan melakukan konfigurasi pada Client. untuk Browser Mozilla Firefox, masuk ke menu : Tools -> Option -> Advanced -> Network -> Setting. Lalu entry IP Address Proxy Server beserta Port 3128.

33. Selanjutnya langsung di coba apakah Client sudah bisa mengakses internet…

34. Konfigurasi pada Client dengan Browser Mozilla Firefox, masuk ke menu : Tools -> Option -> Advanced -> Network -> Setting. Lalu entry IP Address Proxy Server beserta Port 3128. Jika mengunakan browser IE, kita bisa atur melalui Control Panel -> Internet Option.
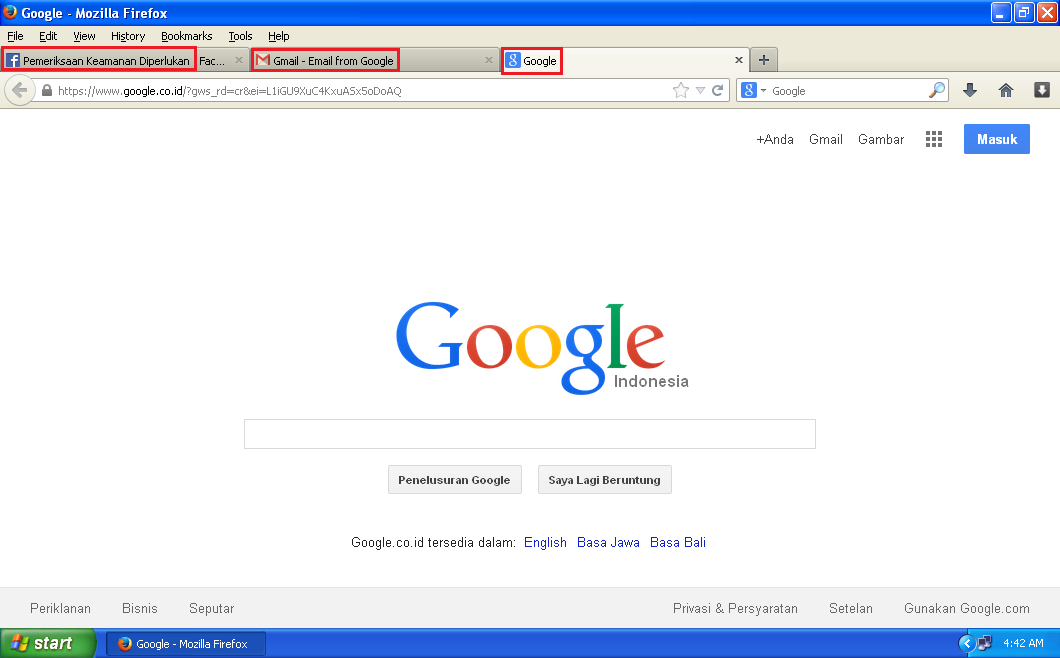
35. Setelah selesai konfigurasi diatas, selanjutnya kita coba akses internet…
36. Mudah sekali bukan??? Selamat mencoba…
Pada tutorial kali ini konsep desain atau topologi-nya adalah sebagai berikut :
- OS yang kita gunakan sebagai Proxy Server kali ini adalah Ubuntu Desktop 14.04.
- IP Address Ubuntu Proxy Server adalah 192.168.10.10. Proxy Server ini mendapatkan akses internet secara langsung dari Router atau Modem ADSL Router dengan IP Address : 192.168.10.1.
- Proxy Server ini berfungsi secara independen tanpa ada campur tangan dari Router Mikrotik ataupun Router lain. Pokoknya Proxy Server ini mendapatkan akses internet dari mana saja, termasuk apabila mengunakan Modem 3G atau ADSL secara langsung pada PC / Proxy Server ini.
- PC Client mendapatkan akses internet secara Direct dari Proxy Server tanpa perantara lain ataupun intervensi dari Router, Mikrotik, dll.
Step By Step Installasi Proxy Server Squid3 dengan Ubuntu 14.04 dan Webmin ( Simple Mode ) adalah sebagai berikut :
1. Masuk ke menu System Setting.

2. Masuk ke Menu Network.
3. Lalu masuk ke menu Option, untuk melakukan konfigurasi IP Address secara manual.

4. Selanjutnya masuk ke menu IPv4 Setting, ubah method dari Automatic /( DHCP ) menjadi manual.

5. Klik Add untuk menambahkan IP Address manual. Lalu entry IP untuk PC Ubuntu : 192.168.10.10, Netmask : 24, IP Gateway : 192.168.10.1, IP DNS : 192.168.10.1. Lalu kita klik Save.
6. Selanjutnya masuk ke Terminal untuk melihat apakah IP address Ubuntu Proxy Server sudah sesuai yang di konfigurasi tadi.

7. Pastikan bisa ping ke IP Gateway ( 192.168.10.1 ), maupun ke Google.com.
8. Selanjutnya kita Install paket Apache2 Webserver ( nanti akan banyak kita gunakan ) :
apt-get install apache2
9. Selanjutnya kita Install paket Squid3 :
apt-get install squid

10. Selanjutnya kita lakukan editing file konfigurasi Squid ( bisa dengan perintah nano maupun gedit ). Pastikan kita setting ACL Internal IP Address Network kita.
nano /etc/squid3/squid.conf
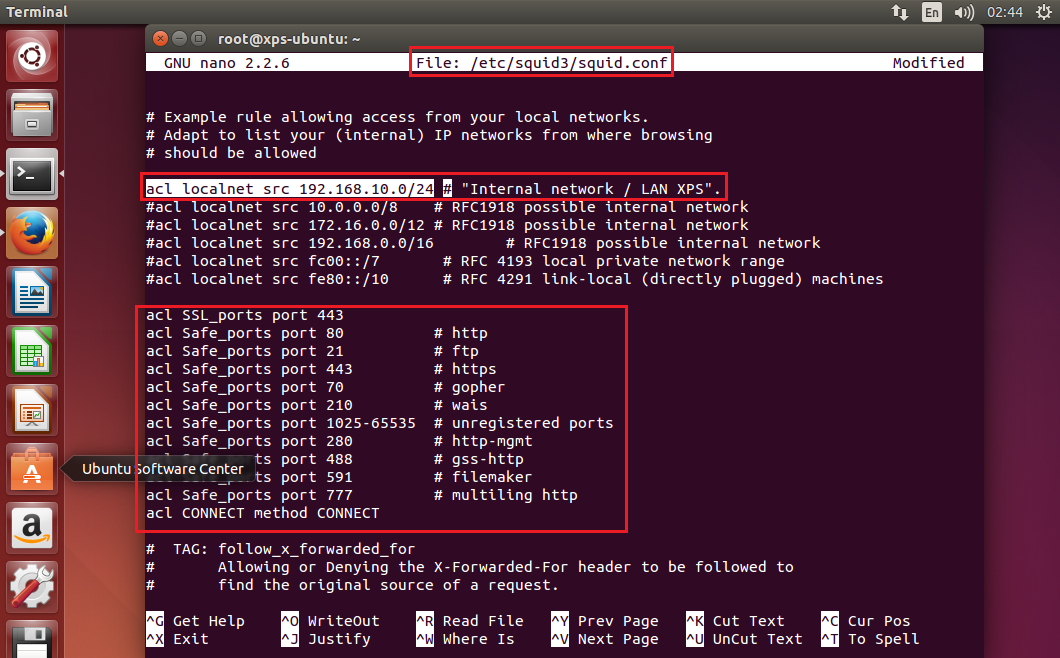
11. Jika kita gunakan gedit, setting Access Control List / ACL Internal IP Address Network kita tampak seperti pada gambar dibawah ini :

12. Selanjutnya pastikan ACL Local network kita disetting Allow.

13. Cek juga setting ACL Local network di baris yang lain.

14. Tentukan folder cache_dir dengan tepat serta ukuran besar kapasitas untuk menyimpan file cache. Nilai Defaultnya adalah 100 alias 100 MB, kita ganti menjadi 50 GB ( 50000 ).

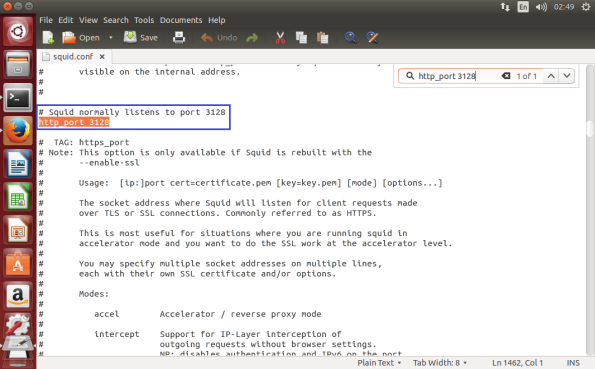
15. Tentukan Port access Proxy Server, defaultnya Squid mengunakan Port 3128.
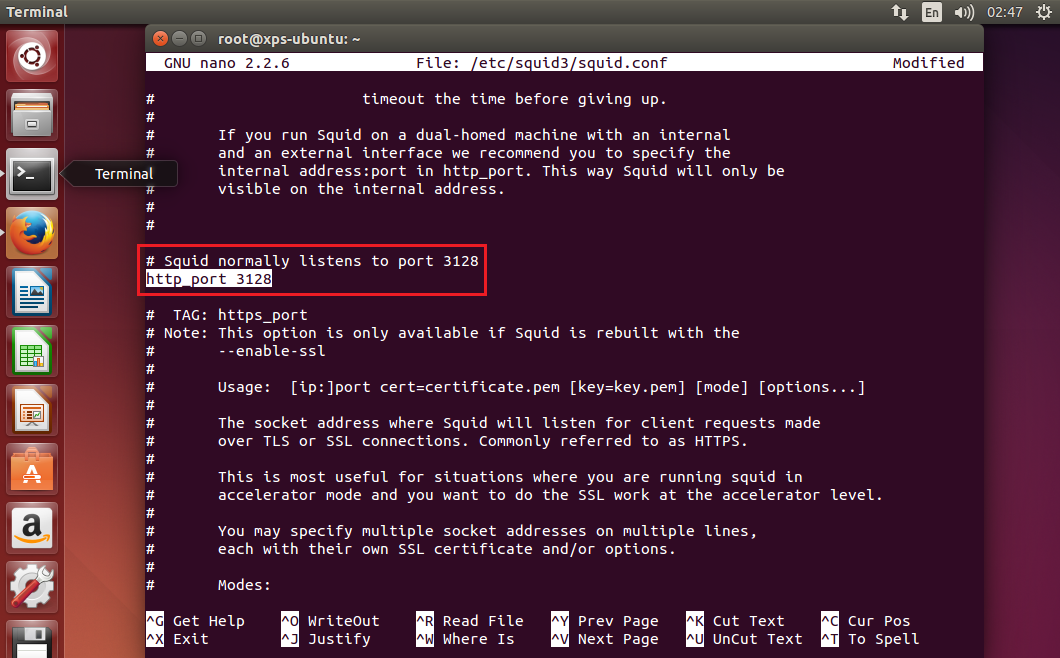
16. Setting Port 3128 dengan gedit.

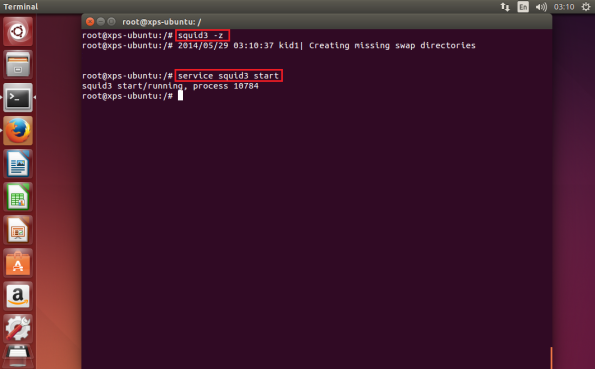
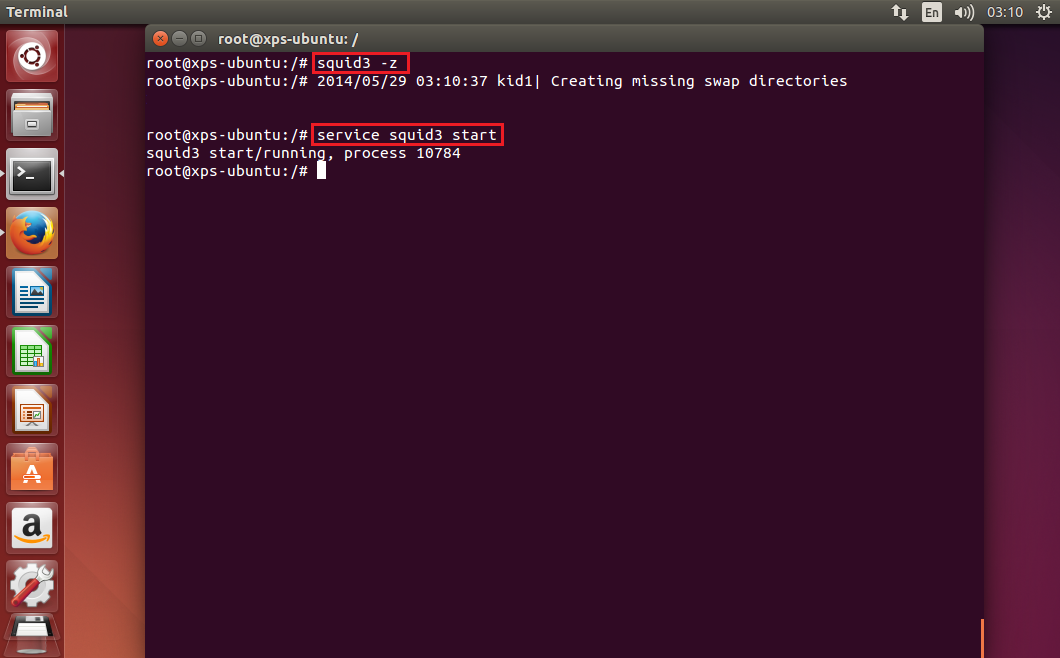
17. Setelah konfigurasi cukup, selanjutnya berikan perintah :
squid3 -z
Tujuannya adalah untuk membuat Swap Directory Cache Squid Proxy.Selanjutnya berikan perintah untuk menjalankan Squid3 :
service squid3 start
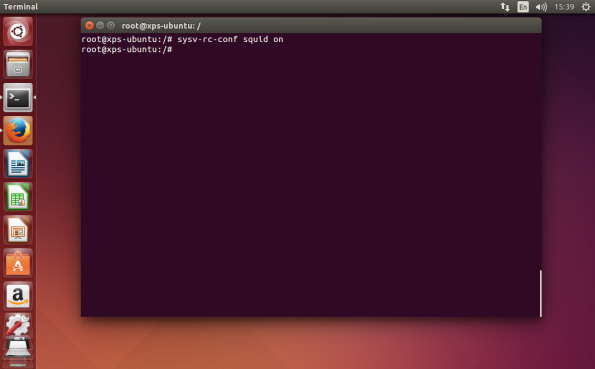
18. Untuk membuat Service Squid3 ini bisa Otomatis dijalankan saat komputer baru hidup, maka kita dapat mengunakan perintah chkconfig atau mengunakan Sysv-rc-conf.
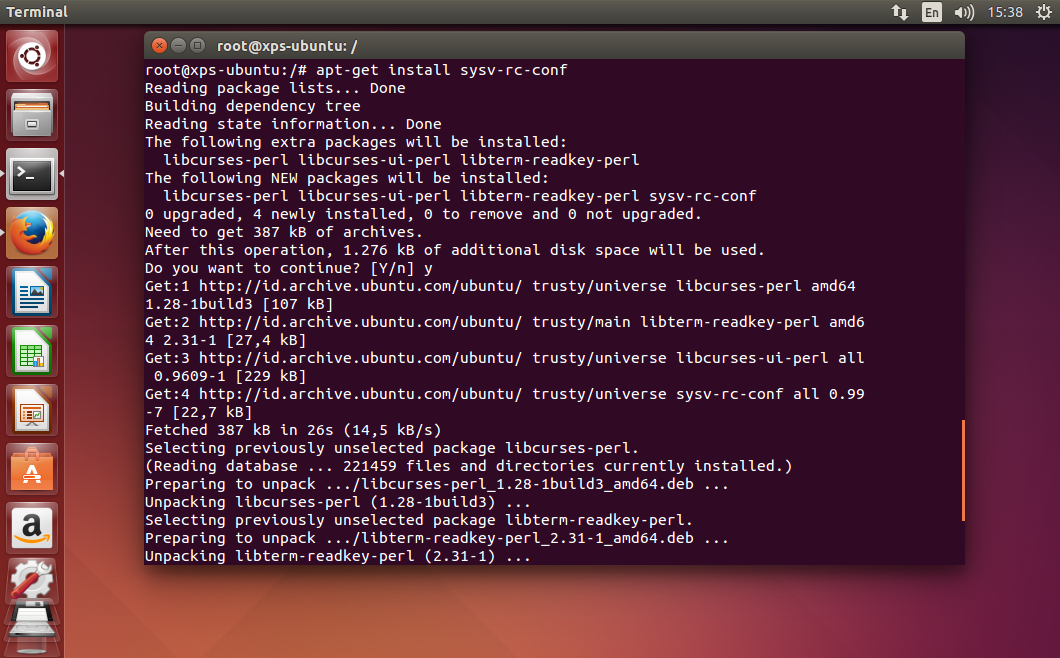
19. Perintahnya adalah :
sysv-rc-conf squid on

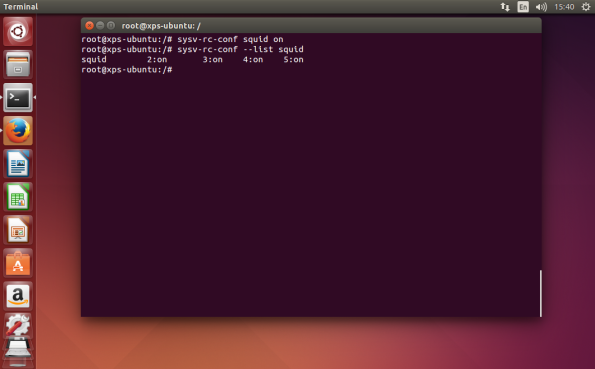
20. Melakukan pengecekan status aplikasi yang telah dilakukan Autorun. Perintahnya :
sysv-rc-conf --list squid

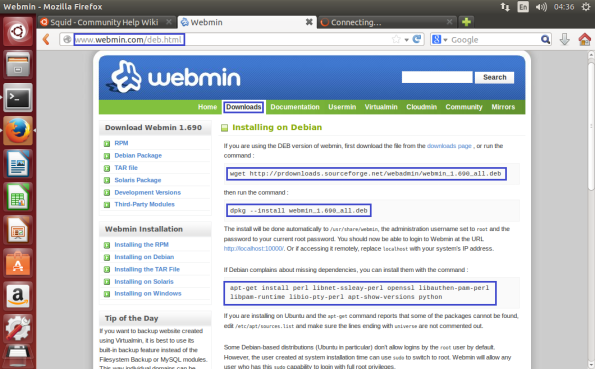
21. Setelah installasi dan konfigurasi Squid selesai, selanjutnya kita akan melakukan installasi Webmin dengan tujuan untuk mempermudah konfigurasi Squid3. Baca link ini dengan seksama : www.webmin.com/deb.html
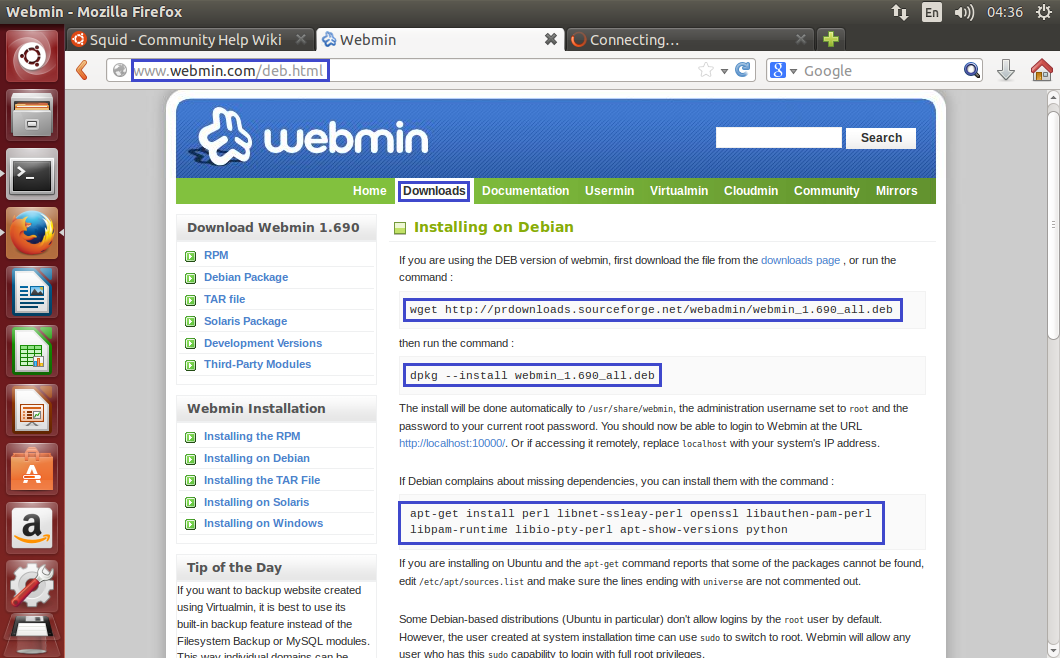
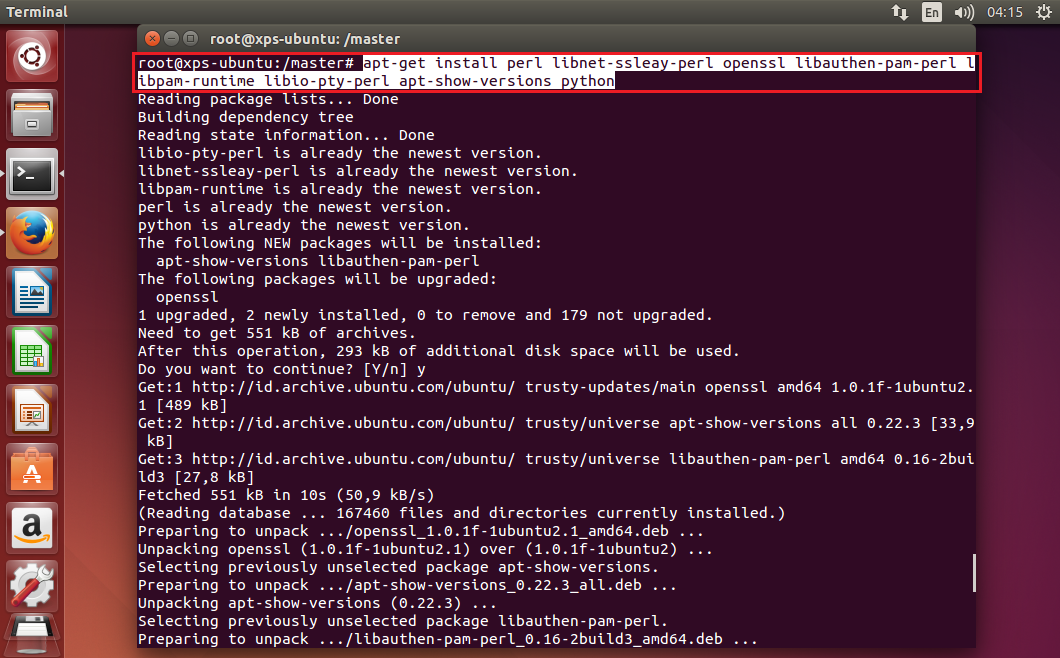
22. Lakukan installasi perintah pre-installasi :
apt-get install perl libnet-ssleay-perl openssl libauthen-pam-perl libpam-runtime libio-pty-perl apt-show-versions python
23. Lakukan perintah untuk men-download installer Webmin :
wget http://prdownloads.sourceforge.net/webadmin/webmin_1.690_all.deb
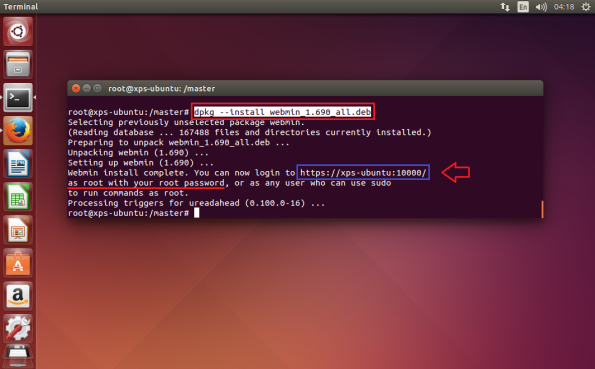
24. Lakukan installasi paket Webmin yang telah di download barusan :
dpkg --install webmin_1.690_all.deb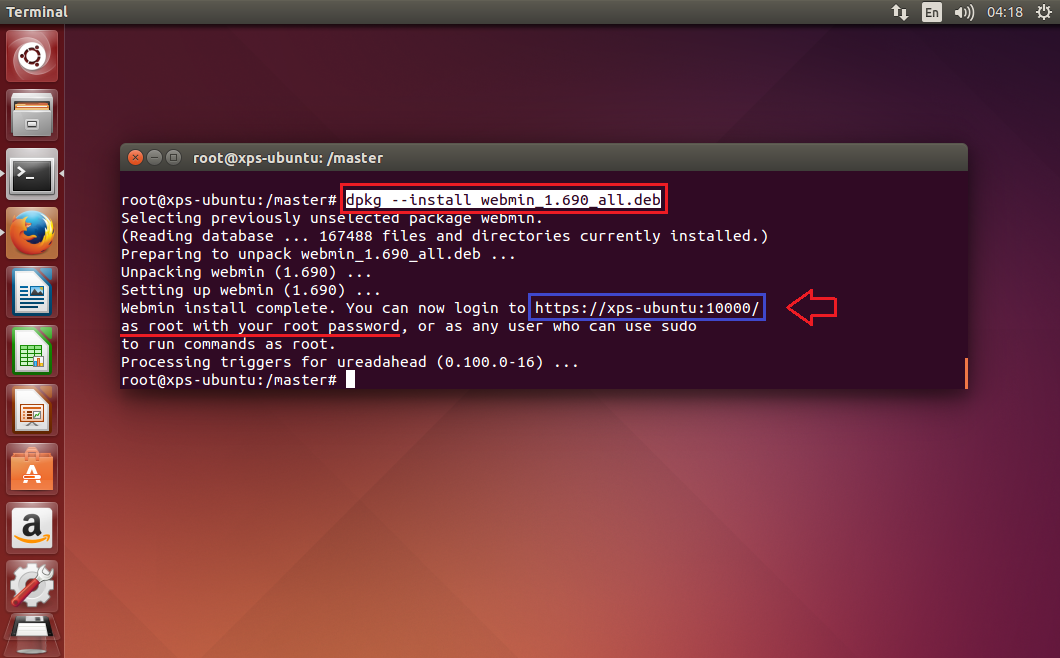
25. Setelah proses installasi Webmin selesai, selanjutnya kita dapat mengakses Webmin via WebBrowser :
https://192.168.10.10:10000
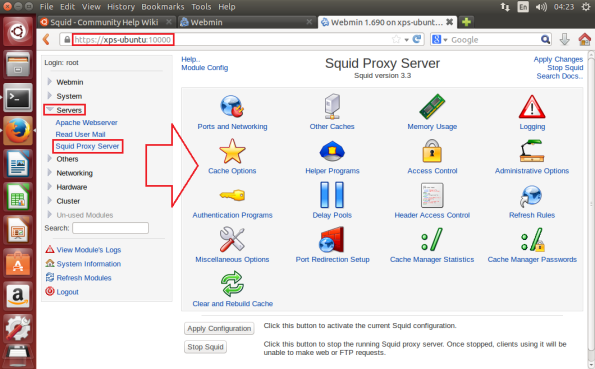
26. Selanjutnya masuk ke menu Server lalu pilih Squid Proxy Server. Selanjutnya kita mau konfigurasi lebih lanjut via Webmin.
27. Administrative menu.

28. Port & Networking menu.

29. Pilih menu Access Control untuk melakukan konfigurasi client mana saja yang boleh mengakses internet.

30. Pilih menu Cache Option, untuk menentukan folder untuk cache, dll.
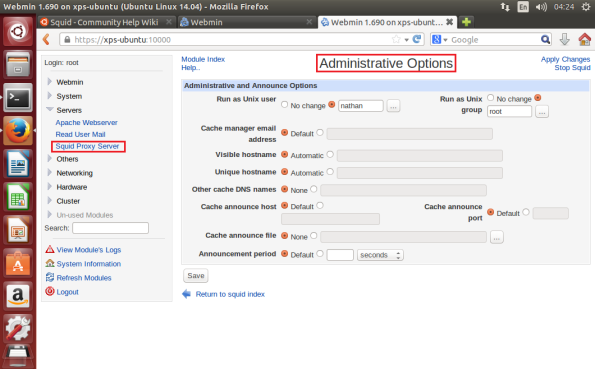
31. Administrative Option merupakan penentuan user Administrator dengan akses dapat melakukan read write pada folder konfigruasi Squid.

32. Okey, sampai disini konfigurasi Squid Linux Ubuntu 14.04 telah selesai. Selanjutnya kita akan melakukan konfigurasi pada Client. untuk Browser Mozilla Firefox, masuk ke menu : Tools -> Option -> Advanced -> Network -> Setting. Lalu entry IP Address Proxy Server beserta Port 3128.
33. Selanjutnya langsung di coba apakah Client sudah bisa mengakses internet…
34. Konfigurasi pada Client dengan Browser Mozilla Firefox, masuk ke menu : Tools -> Option -> Advanced -> Network -> Setting. Lalu entry IP Address Proxy Server beserta Port 3128. Jika mengunakan browser IE, kita bisa atur melalui Control Panel -> Internet Option.
35. Setelah selesai konfigurasi diatas, selanjutnya kita coba akses internet…
36. Mudah sekali bukan??? Selamat mencoba…


